
This document details the manufacturing and assembly of large medical gowns from 2 mil (50 micron) plastic sheeting using a CNC vinyl cutting tool. The design involves one (1) cutting on a CNC vinyl cutter and two sealing steps with a heat sealer to manufacture and assemble. Total time for a two person team to prepare, cut, seal and sanitize a gown was approximately 6-8 minutes.
Making Safe Gowns
Design safety depends on a few major things.
- Using the correct design
- Using the correct process for assembly safely
- Delivering devices with the correct documentation
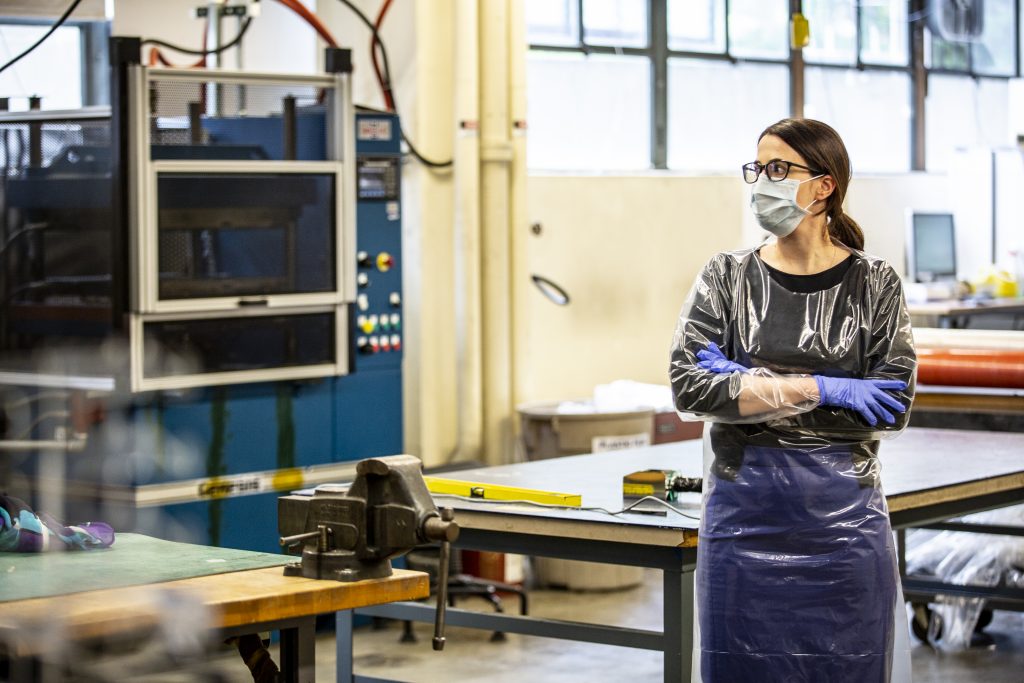
The use of this supplementary gown should always come secondary to existing PPE equipment, standards, and protocol options if available. The decision to implement this device should be made with careful consideration and under the consultation of the corresponding institution’s occupational health and infection control departments.

Materials and Equipment
2 mil U-Line plastic sheeting (e.g. painter’s drop cloth). Materials thinner than 2 mils (38 micron) were found to be too fragile for normal wear. Materials thicker than 2 mils (50 micron) we found to be too bulky to be comfortable wearing for a long time. Using generic painter’s drop cloth plastic sheeting led to tears in the gowns produced.
Therefore, we recommend U-Line (be sure to test other materials before making in bulk).
- CNC vinyl cutter. Minimum suggested cutting area: 60” x 86” (152 cm x 219 cm)
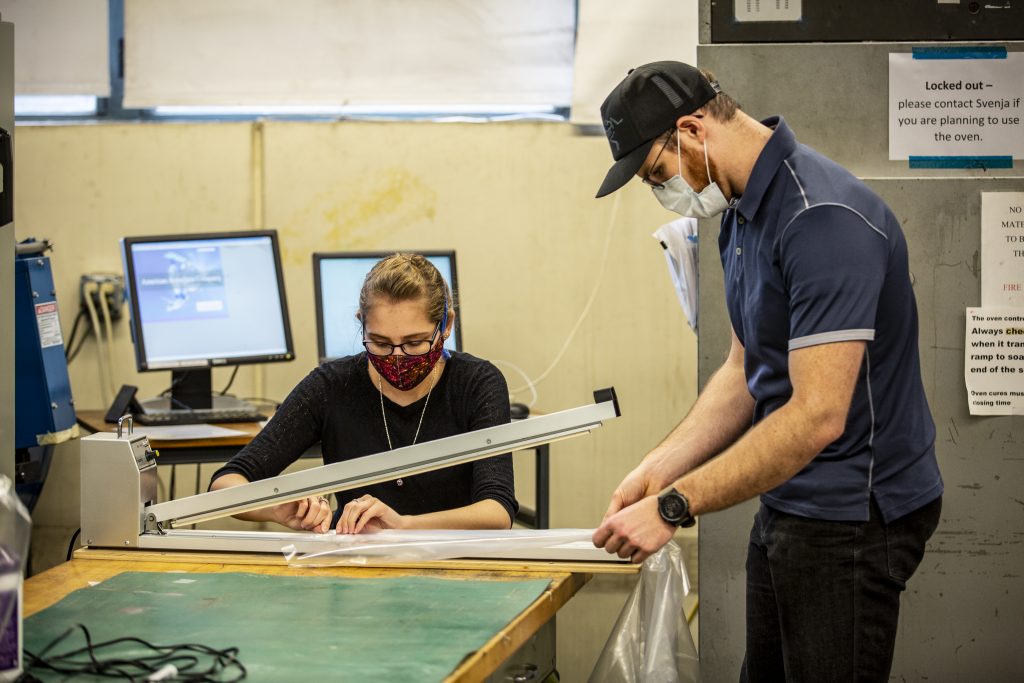
- Heat sealing tool for plastic films. Any tool can be used, but a straight, 2’ (61 cm) length sealer allows for a simple, reliable and reproducible seal.
Design
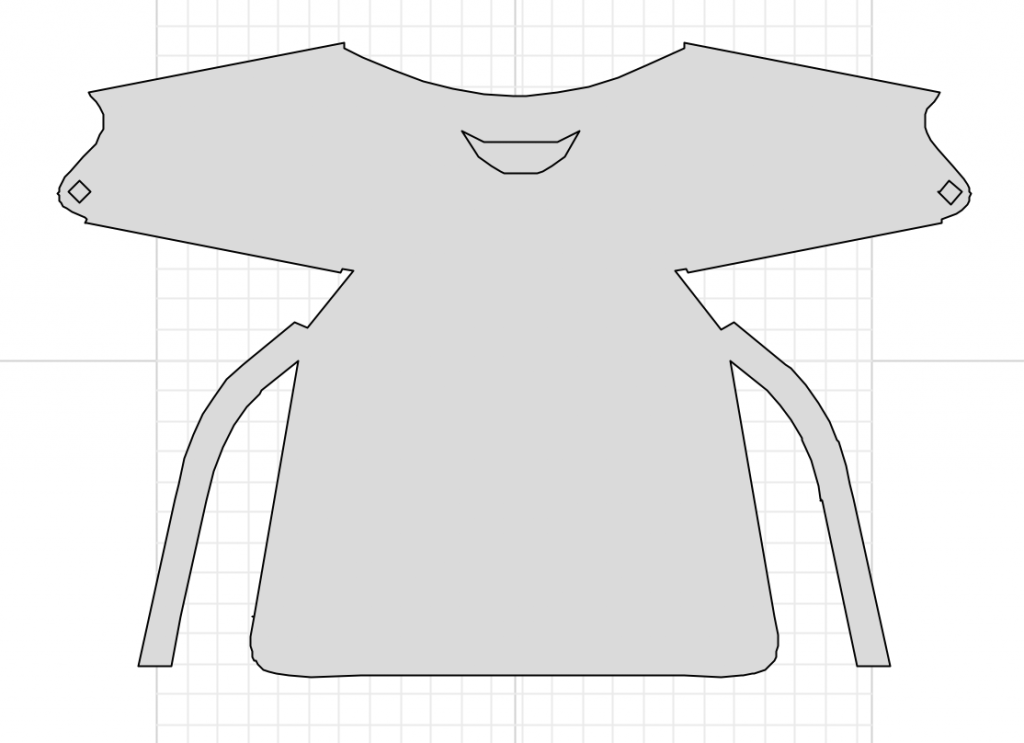
The gown was designed to approximately fit an XL sized man. The digital model used in the below images measures at around 180 lbs (82 kg) and 6’2” (188 cm)

Manufacturing and Assembly
The manufacturing process outlined in this document assumes the reader is properly trained, has all the necessary Personal Protection Equipment (PPE) and is able to run a CNC vinyl cutter. High performance power tools are dangerous and should not be used without proper guidance.
Preparatory Steps
Be sure to follow lab safety protocols, including presence of a safety monitor while manufacturing
To reduce risk, each CNC, all of the parts that it produces, and each sheet of material should be handled by one person (unless dictated otherwise by standard lab safety protocol). This is to reduce the risk of transmission via shared surface contact.
Before placing material on CNC bed, inspect the full surface area to make sure there are no cuts or penetrations in the material. These could compromise the function of the gown.
Obtain an Approved Disinfectant
You will need to disinfect your work environment maintain a clean work environment for the duration of the contact time as defined by the EPA guidelines in List N: Disinfectants for Use Against SARS-CoV-2. The following list is in preferential order and have been tested with this device.
- Super Sani-Cloth
- 10% chlorine bleach solution
- CaviWipes
- Soap and water
Manufacturing
- Cut material to CNC bed size and place on bed
- Either pre-cut the plastic sheeting or or cut to size once on the bed. Gown pattern dimensions are approximately 58” x 84”. It is recommended to use no less than 60” x 86” of material for the gown patterns. Preferred sheet size is 64” x 90”.
- Cut sheet with CNC vinyl cutter. Run the cutting tool with the appropriate software for the CNC cutter.
- Remove material from CNC bed. Carefully separate the gown from the excess material and place on a separate table.
- Make any markings (e.g. date/time of manufacture, serial number) on the gown. For this work a standard Sharpie™ was used to mark the date of manufacturing and a serial number.
Assembly
- Fold arms and seal (refer to Fig 2)
- Lay the gown material flat on a table. Standing with the top of the gown closest to you, take the corners A & B in your hands. Fold these corners down towards the bottom of the gown, folding the sleeve on top of itself. Match the corners labeled in Fig 2 (A folds to A, B folds to B).
- Seal the seam along the length of the folded section from corner A to corner B.
- Ensure that the seal extends for the full length of the arm and is durable by tugging on the seam.
- Repeat on the other arm, taking care to ensure you are folding in the same direction.
- (Optional) Turn arms inside-out to have seams inside of gown. Gown is now completely fabricated; however, it may be preferable to have the new seams on the inside of the sleeves rather than the outside. In this case, simply reach into the sleeve from the neck, grab the cuff and pull toward the neck. Repeat for both sleeves.
Quality Assurance and Disinfection
Clean Gowns
Sanitize: Following organizational guidance, wipe down the gown with a sanitizing cloth or a spray with an alternative sanitizer. You will need to disinfect the gowns using disinfectant as defined by the EPA guidelines in List N: Disinfectants for Use Against SARS-CoV-2. The following list is in preferential order and have been tested with this device.
- Super Sani-Cloth
- 10% chlorine bleach solution
- CaviWipes
- Soap and water
Be sure to let material fully dry after disinfecting
Organize Product for Delivery
Each time assembly has been completed for a single container of manufactured parts, complete the following steps.
- Make sure a copy of the QA sheet you have filled out is taped to the outside of the container
- Fill in the areas marked in yellow on page 2 and 5 of the instructions and tape a printout of the instructions to the container
- Seal the filled container of newly assembled gowns. Options include either double bagging assembled gowns with a knot on both bags and a zip-tie on the outer bag or putting a single bag knot and a zip-tie into a box. Or an equivalent procedure.
Delivery
The delivery process requires as much attention to safety as all of the previous steps. In addition, depending on what you’ve created, you need to consider where to deliver.
Delivery Decision Tree
You may want to deliver gowns to a variety of providers. However, note that this design is not yet marked for clinical use, and as such should not be delivered to a hospital or other clinical setting. Watch this page for updates.
Delivery Protocol
When delivering gowns from a manufacturing unit to an assembly unit or when delivering a container of assembled gowns from the assembly unit to the final drop-off point, follow the steps outlined below.
- Before removing the clean, packed box from the origin location, perform hand hygiene procedures.
- Don a new pair of clean gloves.
- Ensure that the container of parts is closed.
- Fill out QA sheet and make sure all boxes are checked
- Load containers into the delivery vehicle, ideally using a trunk door.
- Doff and dispose of gloves after all containers of parts from one location have been loaded into the vehicle, and before entering the vehicle.
Once at the drop off location,
- Perform hand hygiene procedures.
- Don a new pair of clean gloves.
- Remove the containers and leave at the designated drop-off site.
- Once all containers have been dropped-off, doff and dispose of gloves.
- Perform hand hygiene procedures.
Other Important Information
This document is based on UW-DFab Non-Surgical Disposable Isolation Gown for Minimal-to-Low Barrier Protection from the NIH 3D Print Exchange website. The following assumptions are made:
- You are using ULine 2mil plastic sheeting
- We have attempted to balance the clinical realities, with the need for safety. It is ultimately up to each manufacturer to review this and determine whether it meets the needs of their customers, meets FDA Emergency Use Authorization requirements, and will lead to safe and effective use of the gown.
Refer to CDC guidelines when donning and doffing PPE.
Credits
These instructions have been produced by Liam Fay
This document is open source
They are offered under license CC0 which allows for anyone to use, modify in any way, and use commercially.