
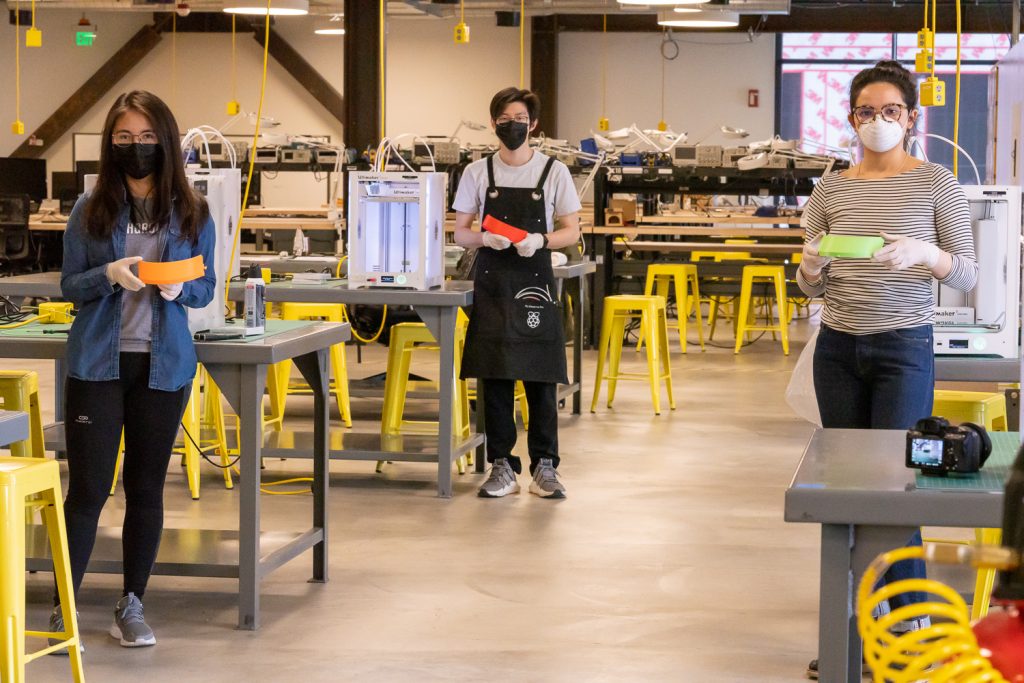
There is a huge need for safe, comfortable face shields. While they are important in hospital settings, they can also protect a variety of other essential personnel. Fortunately, thanks to innovators at Prusa and designthatmatters.org along with collaborators at UW, there is an FDA vetted design that can provide protection when industry standard Personal Protective Equipment (PPE) is not available.
I love it. It makes me feel safer. I was swabbing someone for covid-19 when he vomited on me. It kept me clean.
An ER nurse on the front lines at a Seattle-area hospital, wearing the DtM-v3.0 face shield for the first time on Friday March 27 2020 (see designthatmatters.org)
Please note, however, that this supplementary face shield was created as an emergency action in effort to protect people by providing backup PPE options if the standard PPE has become unavailable. This device has not gone through the same regulatory approval process as standard PPE but has gone through a special verification process expedited strictly for the response to the COVID-19 pandemic.
Making Safe Face Shields
Design safety depends on a few major things.
- Using the correct, FDA vetted design
- Using the correct print settings
- Using the correct process for assembly safely
- Delivering devices with the correct documentation
The use of this supplementary face shield should always come secondary to existing PPE equipment, standards, and protocol options if available. The decision to implement this device should be made with careful consideration and under the consultation of the corresponding institution’s occupational health and infection control departments.
Choosing a Face Shield Design
Based on your manufacturing capabilities, choose a face shield design out of one of the following, sourced from the NIH Print Exchange website. Both of these designs have undergone review in a clinical setting and have been found appropriate when fabricated with the printer type and materials specified.
- DtM-v4.0 Face Shield PPE, Design for Injection Molding
- DtM-v3.1 Face Shield PPE, 3D printable headband
Materials

- Filament for 3D printing. For both designs, PLA is recommended, though PETG, ABS, and Nylon are acceptable alternate materials.
- Elastic for the headband: could be 7”x1/8” rubber bands, 13” strip of 3/4″ wide buttonhole elastic, coflex/coban tape
- A standard US letter-sized transparency or report-cover for the shield, 2-10mil (0.002-0.01”, 0.05-0.25mm) thickness
- Acceptable alternative materials include clear PETG, PMMA or mylar in the same thicknesses cut to 8.5” x 11” (215.9mm x 279.4mm). Dimensions for a US-style three-hole-binder punch: three 6-8mm diameter holes with each center spaced 108mm apart. Do NOT cut PVC
- A permanent (VWR) marker
- Gloves & face coverings for anyone coming in contact with the face shields during production
Printing Face Shields
Often the person or people printing face shields will be separate from the person or people doing assembly. For this reason we have separate QA process for printing and assembly. Prints should be batched according to our QA procedure, and each batch should have an attached Printing QA sheet.
Print Settings

Print settings will vary with material and other factors. However, settings we’ve found that work for PLA and 0.4mm nozzle. This should be adjusted, of course, based on your printer, material, and so on. The goal is to achieve the quality standards tested in the assembly QA process. Print settings should be provided in the Printing QA Sheet
- Nozzle Diameter: 0.4mm
- Programmed Extrusion Width: 0.5mm
- Layer Height: 0.3mm
- Shells: 3 (which results in a 1.5mm wall)
- Infill: 30%
- Infill Type: Grid
- Solid Bottom Layers: 3 (which results in a 0.9mm thick bottom)
- Solid Top Layers: 3 (which results in a 0.9mm thick top)
Printing Quality Control Process

The information included here provides a best effort protocol to minimize risk of viral transmission during assembly and delivery, as well as produce face shields whose quality is as consistent as possible. The goal is to ensure safety even though anyone involved in the process could be a silent carrier of COVID-19.
Preparatory steps
To reduce risk, each 3D printer, all of the parts that it produces, and each spool of filament used for that printer should only be handled by one person. This is to reduce the risk of transmission via shared surface contact.
Prior to printing, obtain a clean bag or box to place finished prints inside. The container must be able to be closed.
- Fill out your initials and contact information
- Add initials for anyone else who comes in contact with the face shields
- Fill out the material being used
- Check off the QA steps shown in the QA sheet throughout the printing and assembly process
Printing
Don’t forget to check the print as you start and end, filling out the QA sheet.
Delivery of Printed Forms
If you are not doing the assembly phase yourself, you’ll need to deliver your printed forms to the assembly site. Follow this process.
- Make sure a copy of the QA sheet you have filled out is taped to the outside of the container
- Fill in the areas marked in yellow on page 2 and 5 of the instructions and tape a printout of the instructions to the container
- Seal the filled container of newly assembled face shields. Options include either double bagging assembled face shields with a knot on both bags and a zip-tie on the outer bag or putting a single bag knot and a zip-tie into a box. Or an equivalent procedure. About 25 face shields fit in a large garbage bag.
- Ensure that bags of face shields are only handled by one person at a time, and are treated as contaminated. Standard donning and doffing procedures should be following when interacting with these bags.
If you are doing assembly yourself, just be sure to set up a clean assembly space and follow all of the processes below.
Assembling Face Shields
The assembly process consists of quality control procedures that make sure all finished products are not defective. The assembly process consists of attaching the shield to the cradle and connecting a headband strap.
Assembly Quality Control Process
Print the Assembly Quality Assurance (QA) Sheet (doc) and write your initials on it, leaving room for any other handlers’ initials. Fill it out and update it as you go through the process.
- Fill out your initials and contact information
- Add initials for anyone else who comes in contact with the face shields
- Fill out the material being used
- Check off the QA steps shown in the QA sheet throughout the printing and assembly process
Check cradle for print quality
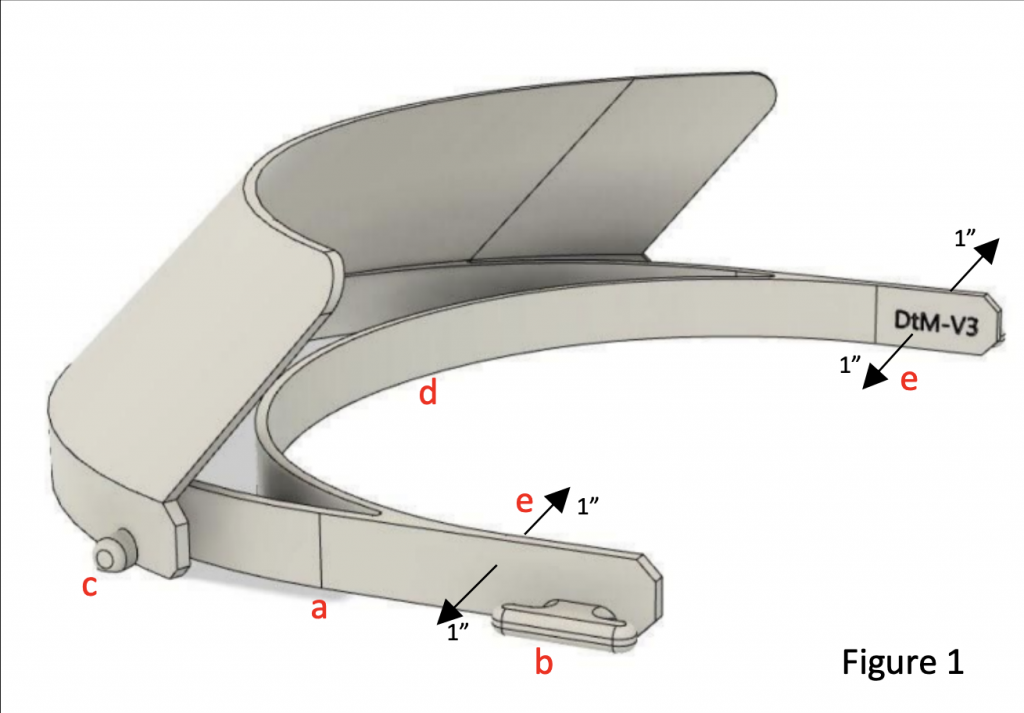
Figure 1: Image of the 3D printed portion of the face shield with labels that will be needed to follow instructions.
- Identify the flat face, this will indicate the bottom of the Cradle (label “a” in Fig. 1). Perform a bend test on the Cradle by pressing inward on the outside of two edges with gentle to medium pressure, then pressing outward on the inside edges. Ensure the Cradle does not crack, snap, or otherwise show signs of distress under 1 inch of deflection on both sides (label “e” in Fig. 1).
- Take a hold of the bottom (d) and top of the face shield and try to crack the visor by pressing down.
- Check for smoothness. The ideal way to address any issues with burrs and bumps on the print, which can be a collection place for bacteria and virus, is to remove them with a sterile deburring tool.
- Label the face shield. This should be done by using a VWR marker and a stencil. The stencil will need to be printed and cut out or laser cut and should show the item version. The following images can be used as stencils, and you can find dxf versions of the files here: DTM3 DTM4


Assembly
The assembly process impacts the safety of the final product due to issue with cleanliness (have you ensured that even if you are a carrier the device is clean) and whether you used proper materials.
It is likely that you may print many shields and then collect them in one place for assembly. Before beginning the assembly process, you should prepare to follow the steps below.
Obtain an Approved Disinfectant
You will need to disinfect your work environment and each face shield and maintain a clean work environment for the duration of the contact time as defined by the EPA guidelines in List N: Disinfectants for Use Against SARS-CoV-2. The following list is in preferential order and have been tested with this device.
- Super Sani-Cloth
- 10% chlorine bleach solution (*May fog Shield over time)
- CaviWipes
- Soap and water
Preparing for Assembly
To prepare your work environment, do the following:
- Disinfect the work environment.
- Perform hand hygiene procedures.
- Don a clean pair of gloves.
- Prepare a clean bag or box to contain the fully assembled parts.
- Take one container of manufactured cradles and remove the QA sheet.
- Add your initials to the QA Sheet and tape the sheet to the outside of the new bag or box.
Assemble Cradle and Place in Clean container


- Wipe down and disinfect the all faces and features on the Cradle.
- (Optional) Place a strip of micro-foam surgical tape on the inside edge of the Cradle (label “d” in Fig. 1) to increase comfort while wearing the face shield.Take one elastic strap and slide it through the two attachment posts on either side of the Cradle positioning it two holes in from the edge of the elastic strap (label “b” in Fig. 1).
- Wipe down and disinfect both sides of the clear plastic Shield.
- Ensure the surface of the Shield is visibly wet with the disinfectant product for the duration of the contact time as defined by the EPA guidelines in List N: Disinfectants for Use Against SARS-CoV-2.
- Wipe any excess disinfectant and dry the face shield using a clean paper towel
- Holding the Cradle in your non-dominant hand, secure one of the outer holes in the Shield to the Cradle peg (label “c” in Fig. 1). Pull the Shield across the Cradle so that the middle and remaining edge holes line up with the pegs on the Cradle. The shield should gentle snap into place.
- (Optional) Place a piece of tape over the 3 mounting holes/pegs in the face shield to fully seal any remaining gaps.
- Turn the face shield so the front is facing the ground and hold it by the forehead visor. Gently shake the face shield to ensure that the shield is securely fastened and will not fall off during use.
- Do a final inspection of the face shield with all components assembled to ensure nothing is damaged and everything has been assembled properly.
- Place the assembled face shield in a clean delivery container
Organize Product for Delivery

Each time assembly has been completed for a single container of manufactured parts, complete the following steps.
- Make sure a copy of the QA sheet you have filled out is taped to the outside of the container
- Fill in the areas marked in yellow on page 2 and 5 of the instructions and tape a printout of the instructions to the container
- Seal the filled container of newly assembled face shields. Options include either double bagging assembled face shields with a knot on both bags and a zip-tie on the outer bag or putting a single bag knot and a zip-tie into a box. Or an equivalent procedure. About 25 face shields fit in a large garbage bag.
Once the container is prepared you should start a new one.
- Doff and dispose of gloves.
- Perform hand hygiene procedures.
- Don a new pair of gloves.
- Prepare a clean bag or box to contain the fully assembled parts.
- Take one container of manufactured cradles and remove the QA sheet from the outside.
- Add your initials to the QA Sheet and tape the sheet to the outside of the new bag or box.
- Perform Assembly Steps above.
Delivery

The delivery process requires as much attention to safety as all of the previous steps. In addition, depending on what you’ve created, you need to consider where to deliver.
Delivery Decision Tree
You may want to deliver face shields to a variety of providers. Some examples of the people who could benefit from them or have already requested or accepted donations from some of our partners include:
- Community use
- Police officers
- Grocery store workers
- Caregivers who work in a living space for at-risk residents
- Clinical use
- Hospitals
- Emergency medical technicians (EMTs)
Depending on what you have printed, you should adjust who you may deliver to. Here are some important considerations
- If you have printed in PLA, you should only deliver to people who will keep the face shield in an indoor environment. If you use PETG or ABS you could deliver to people who may keep the face shield in a hot car such as police officers or EMTs
- If you have printed the DTM-v3.1, it is ok to share in clinical settings.
- If you have printed anything else, it should only be shared for community use, unless it explicitly says on the NIH print exchange page for that device:
This design has undergone review in a clinical setting and is recommended when fabricated as instructed.
Delivery Protocol

When delivering a container of Cradles from a manufacturing unit to an assembly unit or when delivering a container of assembled face shields from the assembly unit to the final drop-off point, follow the steps outlined below.
- Before removing the clean, packed box from the origin location, perform hand hygiene procedures.
- Don a new pair of clean gloves.
- Ensure that the container of parts is closed.
- Add your initials to the QA Sheet that should be attached to the container of shields.
- Load containers into the delivery vehicle, ideally using a trunk door.
- Doff and dispose of gloves after all containers of parts from one location have been loaded into the vehicle, and before entering the vehicle.
Once at the dropoff location
- Perform hand hygiene procedures.
- Don a new pair of clean gloves.
- Remove the containers and leave at the designated drop-off site.
- Once all containers have been dropped-off, doff and dispose of gloves.
- Perform hand hygiene procedures.
Other Important Information
This document is based on the instructions for use (IFU) posted with the DTM-v3.1 on the NIH print exchange. The following assumptions are made:
- You are using the 3-hole punch U.S. Letter version of the face shield: language would need to be altered if using the A4 version for Europe.
- There are porous parts in the device, so includes a warning not to submerge the device.
- The HEADBAND STRAP might be a Fabric-based material such as elastic or buttonhole elastic which are not deemed cleanable, so instructions don’t show Headband Strap being cleaned.
- There could be fabric components to the device that include acrylic, modacrylic, nylon, olefin, polyester, wool, or any combination of these fibers. If any of these are included, a warning must be added to say “do not use in presence of high intensity heat source or flammable gas” in order to comply with FDA EUA letter 9 April 2020.
Credits
- These instructions have been produced based on instructions produced Spark Health Design. Many thanks to illustrator Natalya Zahn (https://www.natalya.com/) for the graphical instructions, and industrial designer Gerd Schmieta for the product rendering (http://www.schmietaplus.com/)
- DtM and Spark Health Design created these face shield designs with feedback from University of Washington and clinicians at Harborview Medical Center. It attempts to balance the clinical realities, with the need for safety. It is ultimately up to each manufacturer to review this and determine whether it meets the needs of their customers, meets FDA Emergency Use Authorization requirements, and will lead to safe and effective use of the Face Shield.
- These designs derived from one published and developed by Prusa.
This document is open source
They are offered under license CC0 which allows for anyone to use, modify in any way, and use commercially.